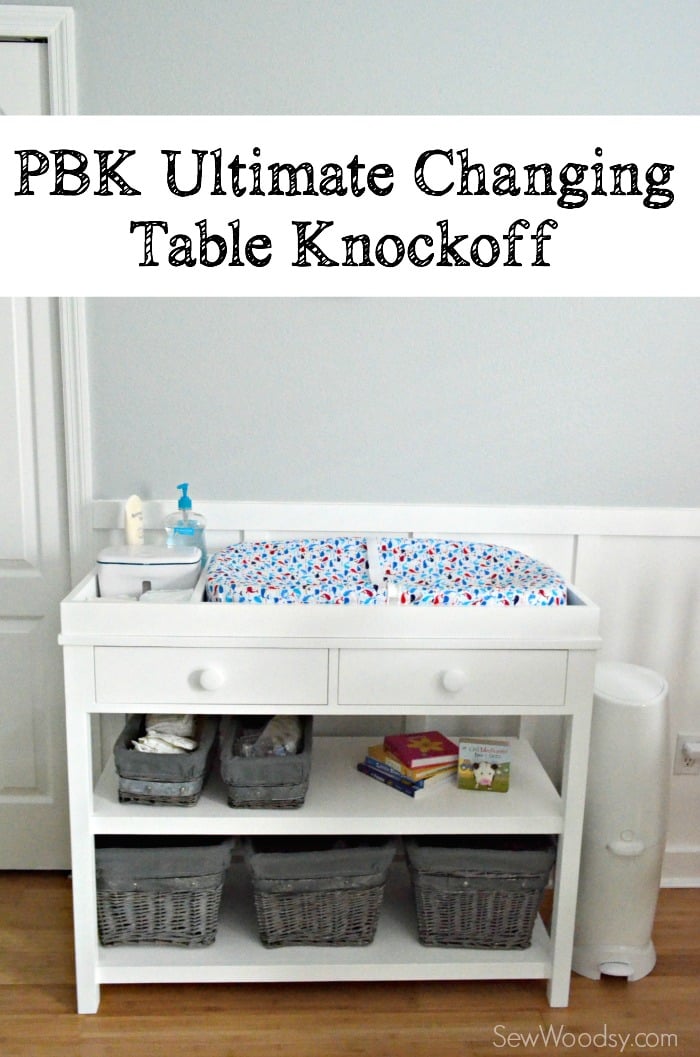
We started working with Ana on these plans for a knockoff version of the Pottery Barn Kids Ultimate Changing Table before Ryder was born. We got the plans the day before I was sent to the hospital to be induced. A week later we were home and my mother in-law insisted Jon and I get out of the house and take a few hours away from the baby. So we did, and where did we go? To The Home Depot to pick up supplies for this changing table. Then throughout the months (yes, as in April, May, and June) Jon worked on the changing table. A few cuts here, a few Kreg jigs there, until he finally was ready to paint! The changing table has been done for two months now and I’m so excited we finally get to reveal it on Sew Woodsy! It turned out great and it’s so nice to have the extra storage. We both know this changing table will be short lived and already have plans for where this will go once Ryder is done with it. Jon added brackets to the topper and they are attached to the back of the changing table so that we can take it off and have no damage to the actual furniture itself! For $100 you can have this knockoff version of the Pottery Barn Kids Ultimate Changing Table!
For the full plans head on over to http://ana-white.com/2014/08/plans/ultimate-changing-table
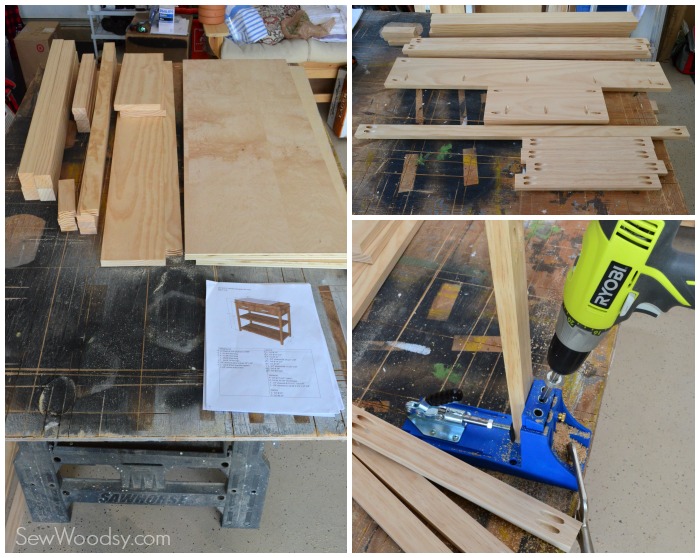
Supplies to shop for:
- 1/2 Sheet of 3/4” PureBond Hardwood Plywood
- 2 – 2×2 @ 8 feet long
- 3 – 1×2 @ 8 feet long
- 1 – 1×6 @ 10 feet long
- 1 – 1×4 @ 12 feet long
- 1/4” PureBond Hardwood Plywood piece at least 16” x 35”
- 2 – 1×3 @ 8 feet long (for topper)
- 1-1/4” pocket hole screws
Cut List:
TABLE:
- 4 – 2×2 @ 32”
- 4 – 1×2 @ 14-1/2”
- 4 – 1×2 @ 38”
- 2 – 3/4” PureBond Hardwood Plywood @ 14-1/2” x 38”
- 2 – 1×6 @ 14-1/2”
- 1 – 1×6 @ 38”
- 1 – 3/4” PureBond Hardwood Plywood @ 17-1/2” x 41”
- 1 – 1×2 @ 38”
- 3 – 1×2 @ 4-3/4”
DRAWERS
- 4 – 1×4 @ 15-1/2” (sides)
- 4 – 1×4 @ 15-3/8” (front/back)
- 2 – 1/4” PureBond Hardwood Plywood @ 15-1/2” x 16-7/8” (bottom)
- 2 – 3/4” PureBond Hardwood Plywood or 1×6 @ 4-1/2” x 17-5/8” (front)
TOPPER
- 2 – 1×3 @ 41”
- 3 – 1×3 @ 16”
*Jon did all the pocket holes before building.
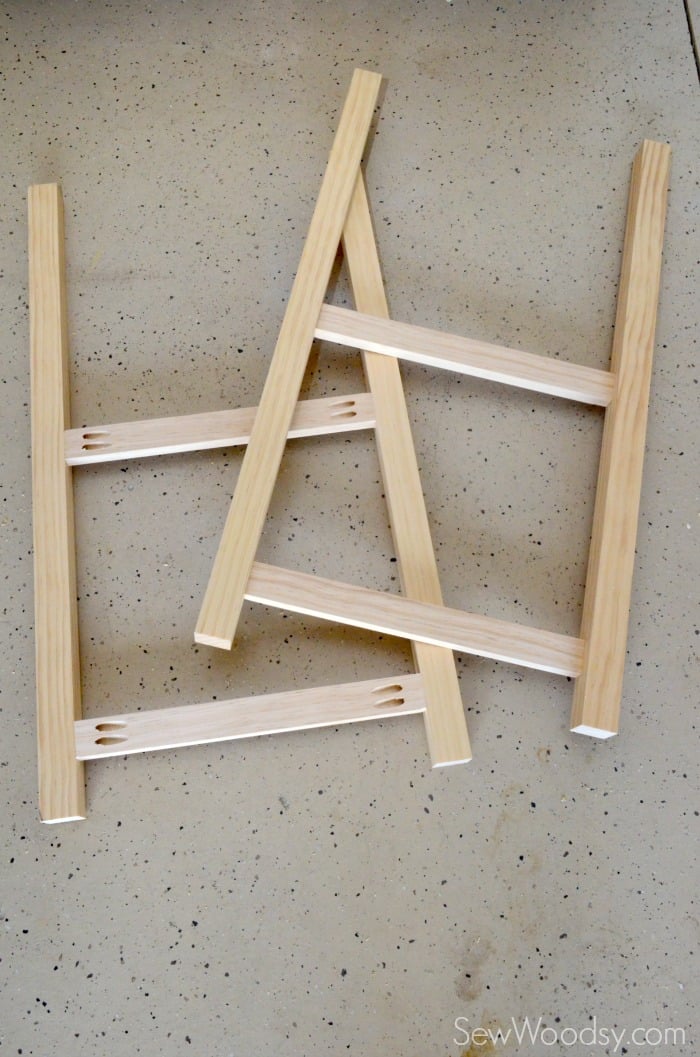
Drill (2) 3/4” pocket holes on each end of the 1×2 @ 14-1/2” long. Attach to the 2×2 legs with 1-1/4” pocket hole screws, flush to inside, keeping pocket holes hidden on insides. *The upper shelf can be placed at any height. In this plan, the upper shelf is placed to allow 12” height on lower shelf.
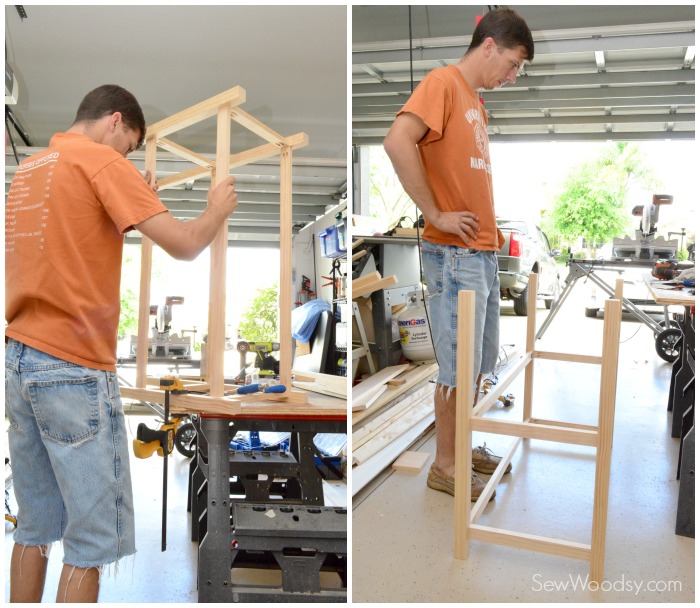
Drill 2 – 3/4” pocket holes on each end of the 1×2 @ 38” long and attach with 1-1/4” pocket hole screws to the 2×2 legs, at the same height as the side 1x2s. Keep 1×2’s flush to inside of the legs.
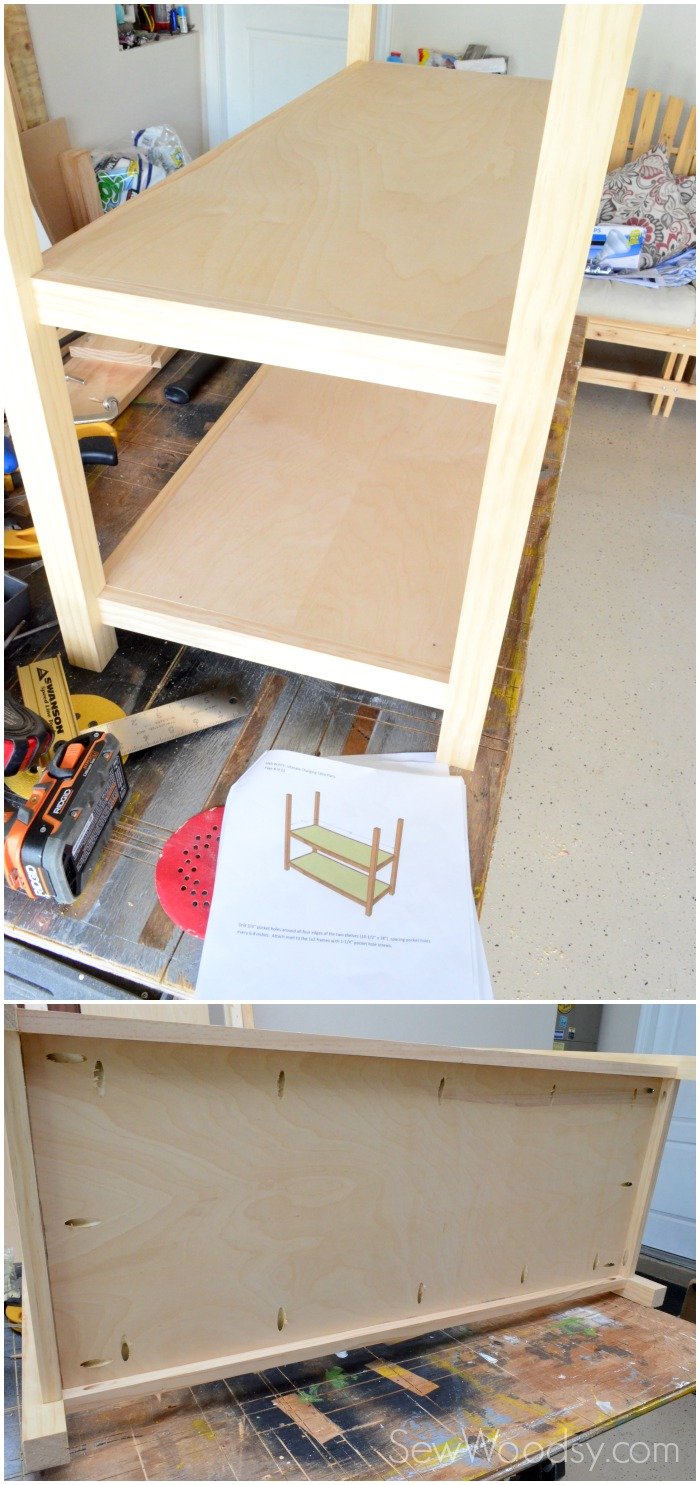
Drill 3/4” pocket holes around all four edges of the two shelves (14-1/2” x 38”), spacing pocket holes every 6-8 inches. Attach inset to the 1×2 frames with 1-1/4” pocket hole screws.
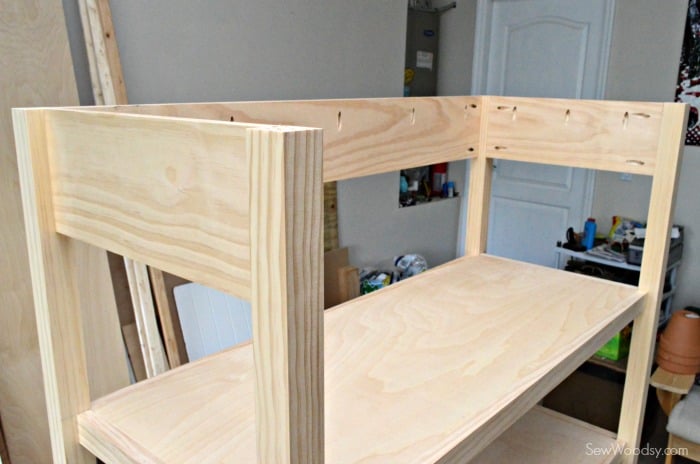
Attach the 1×6 side and back aprons with 3/4” pocket holes and 1-1/4” pocket hole screws. Also drill 3/4” pocket holes on the insides of the aprons facing upward to attach the top in later steps. The backboard should be flush to the outside of the legs.
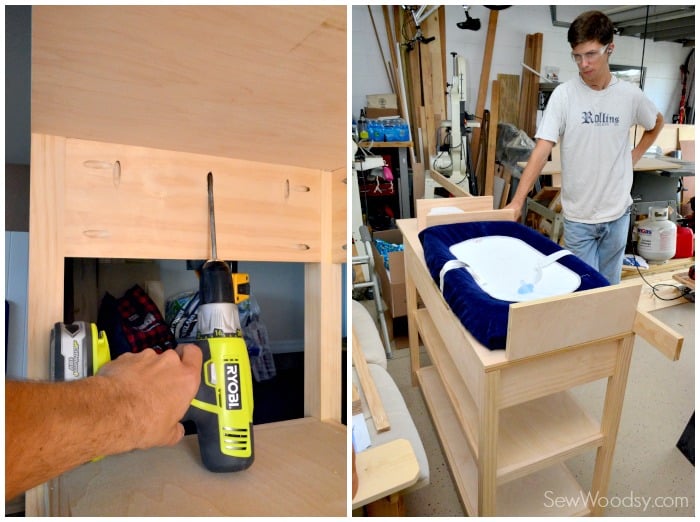

Attach the shorter 1×2 boards to inside of drawer area. Then attach bottom 1×2 with glue and finish nails we like to use our RYOBI Air Strike Brad Nailer – also use pocket holes to attach to legs.

Trim out around top with molding or 1×1’s to finish plywood edges. For a more finished look, miter corners which is what we choose to do.

Build topper with either finish nails and glue or pocket holes. The bottom is not necessary. We attached the topper with a bracket on back side to keep in place. Then we can use it for something else once we don’t need the changing table! We adjusted the 32” measurement to 30” to fit our changing pad and wipe container better. That’s the beauty of building the changing table yourself you can adjust measurements to better fit your needs! P.s. we love our OXO Perfect Pull™ Wipes Dispenser

(Not pictured) Attach drawer face to drawers with 1-1/4” finish nails and glue, then attach from inside with 1-1/4” screws. It may be easier to attach handles or knobs before attaching the drawer faces. Jon waited to do this until the end.
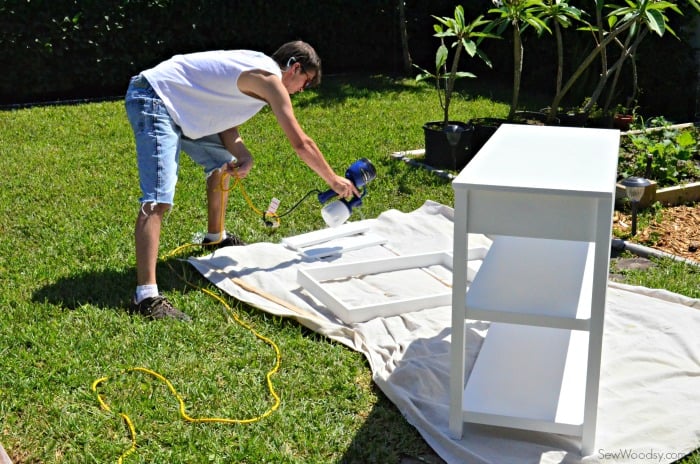
Once your changing table is done, it’s time to paint! We love using the HomeRight Finish Max Fine Finish HVLP Sprayer. If your looking for a clean paint job–this is the tool you need to use. It gives the smoothes finish and uses 1/4 of the paint we would normally use to paint furniture. Plus it has three pressure settings, so depending on what you are spraying you can set the nozzle to spray how you want it too. This helps to give you the ultimate control when spraying! We will NEVER paint furniture any other way again! Jon did 2-3 coats outside letting them dry in between coats. The only thing you need to worry about when spraying outside is dust particles and bugs sticking to your furniture! After the changing table was dry we moved it into the garage and let it sit an additional 72 hours before adding the drawer slides and moving it in the house.
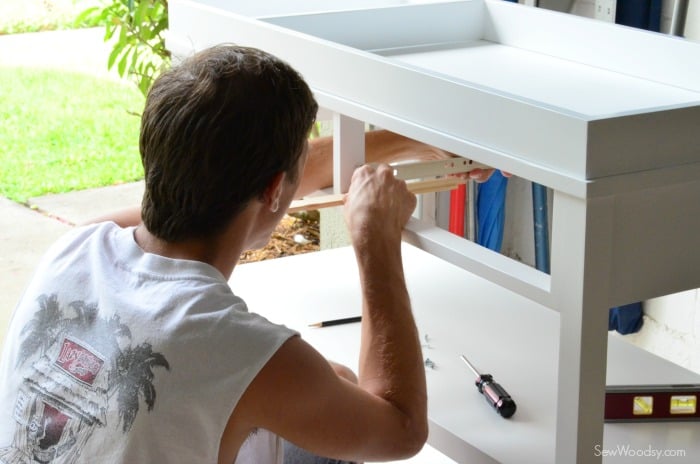
Jon waited to install the drawer slides until after the table was painted. Make sure you insett 3/4” to allow for the drawer face.
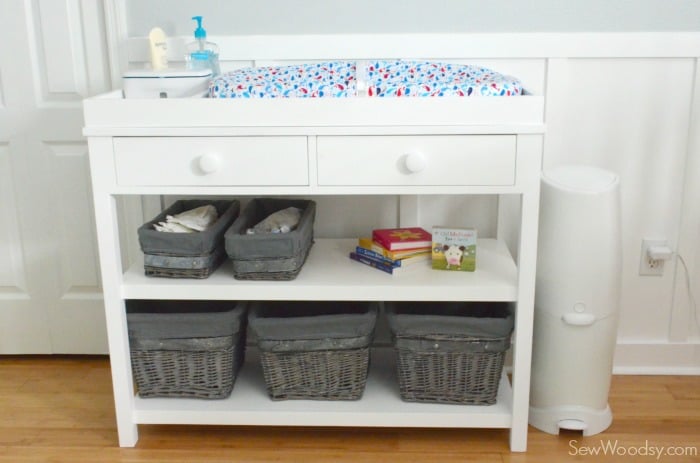
And here it is in all it’s glory! I’m in love with it. And even better we can take the topper off once we don’t need a changing table and use it as an entry way table! Can you believe we made this for $100? It retails at Pottery Barn Kids for $500!!!
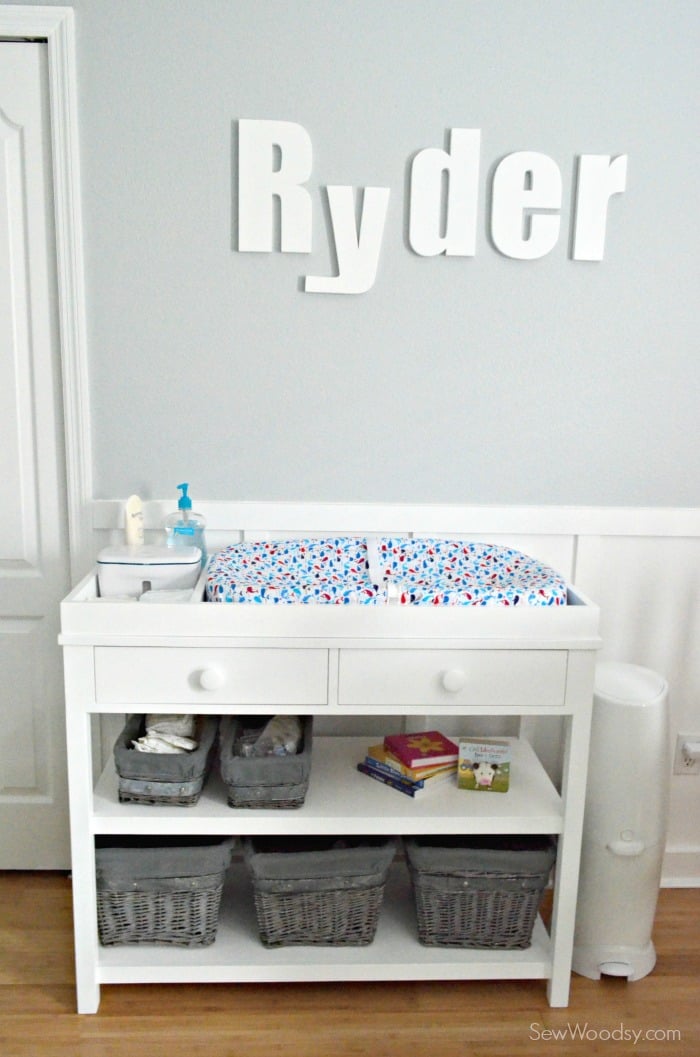
Look for a post on how to make that custom changing table cover next week! It’s so easy to make… you’ll be making a ton in no time! Love the letters above the changing table? Learn how to cut letters using a scroll saw. Yep, you guessed it. We made it!
Here are the other tutorials from our nursery project:
Disclaimer: The brands we mention in this post we absolutely love. We were provided products from them; however, if we weren’t we would have purchased them ourselves. All opinion are our own and do not reflect the brand!
Original article and pictures take http://sewwoodsy.com/2014/08/pbk-ultimate-changing-table-knockoff.html site
Комментариев нет:
Отправить комментарий